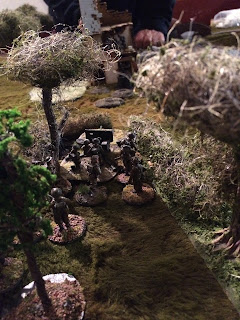
Well this week Chain of Command time came around again. This
time Dave prepared the flank attack scenario for us to play. We diced to see
who would attack and who would defend. At this point the first question was could
Dave beat my role of two? Not a bit of it he rolled a one. In the end I opted
to command the defending British Expeditionary Force while Dave commanded the all-powerful
Wehrmacht.
Once we deployed our jump off points I felt very fenced in
having only a quarter of the map to deploy in. It was quite clear that Dave was
planning to push for the ruined house which offered a strong position to anchor
a defensive position.
Once it came to deploying I opted to take a big gamble. To deploy an infantry section and a HMG team right on my jump off point behind the house in the hope I could secure it prior to Dave’s forces taking it, in the hope it would be too expensive to consider assaulting. Has I was placing the figures I realised this was a stupid thing to do. By the end of the next phase the building had been assaulted my Vickers team were dead and the following phase the infantry team were left cowering behind the building before being dispatched by the Panzer 38(t) which supported the assault. At this point I accepted the loss of these units and worked to salvage the situation.
By now the only unit I had on the table were a sergeant, who was busy running away from the blood bath in the house and a nervous looking 2 pounder crew who had just witnessed their infantry screen obliterated.
At this point if I hoped to survive I'd need to
dig in like a tick and make the Germans work hard to push me off the board.
Thankfully in the following rounds I had sufficient dice to deploy my three
remaining infantry squad. One of which deployed in the in the orchid, another
dug in on the river bank to defend the flank against a developing flank attack.
The third squad came up accompanied by a Lieutenant to support the 2 pounder.
Now all I needed to do was to keep shooting. By now the
Germans had consolidated his gain of the house and were busy rolling off shock.
This gave me an important breathing space to get the defensive positions in
order.
I noticed at this point that the house was occupied
with the best part of two German squads. Using the 2 pounder and a couple of
infantry squads I kept up sustained fire on these units slowly wearing them
down until they became pinned. On the right my squad dug in along the river
bank effectively despatched the German flanking probe with some very effective
shooting. It was so effective I found myself apologising for rolling so well,
has I would routinely get four to six
hits with each section that fired.
At this juncture a StuG III appeared to add some extra
pressure on my 2 pounder. The result of which was the 2 pounder being pinned. Seeing
an opportunity to turn the tables Dave advanced with Panzer 38(t) in the
centre. With all the luck and jamminess I could muster I rolled a three
allowing me to deploy my Boys AT team, who scored a hit forcing the tank to
reserve.
At this point the Germans were losing their will to fight
with two squads pinned and a third one destroyed. The British 2 pounder was
pinned, they lost an infantry squad and a Vickers HMG.
At this point the game stumbled into sort of stale mate where neither side were willing or strong enough to push through to final victory, giving a draw. However, the victory conditions of the scenario required the British to be pushed off the board so I can claim a paper victory!


A great looking game with beautiful (and effective!) defensive terrain Jerry!
ReplyDeleteMerci Phil , I am pleased you enjoyed the write up.
ReplyDeleteCheers,
Jerry